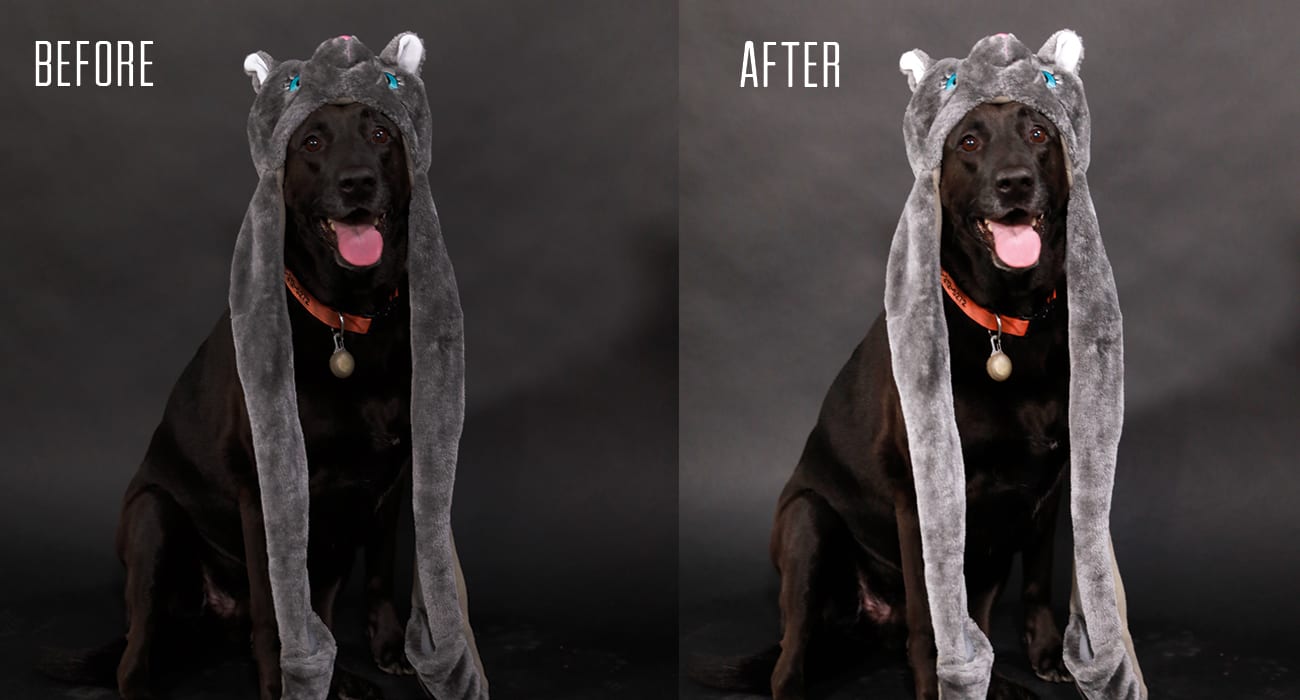
As a part of projects, I am often tasked with editing photos. There are plenty of really silly and fun things you can do with Photoshop’s editing tools, but I thought a good old fashioned list of things that would actually improve the average photo might be helpful to share! Below is a list of my top ten tips for basic photo editing in Photoshop.

Lighting
When looking to begin photo editing in Photoshop, the first (and easiest) thing you can do is edit the lighting. There are a few aspects of a photo that are affected by the lighting, but I narrowed it down to the top four most common to look out for. There are a lot of tools on Photoshop that will fix these issues but the easiest thing to do is adjust the levels of the photo:
- Unusually dark areas that aren’t meant to be dark
- Blown out, or overly bright, areas
- An imbalance of warm or cool lighting
Have photography needs? We have a team of experts that will take your business to the next level.
Shine
Shine, or glare, are concentrated areas of white. Areas of white can distract the viewer from the important aspects of the photo. To make sure all the details of a photo are clear, you can use the brush tool in Photoshop to “paint” over the added brightness of a photo. When looking for shine, check for:
- Glares in glasses
- Shiny face
- Glares on windows/walls

Eyes and Teeth Photo Editing In Photoshop
Sometimes, you might be asked to improve the brightness of someone’s eyes or teeth. To remove the yellow or red coloring, use the saturation levels. When doing this, make sure you are aware of the delicate balance between accidentally making someone look natural and unnatural. Below are the easiest ways to improve someone’s eyes and teeth:
- Lighten eyes, take redness out
- Take yellow out of teeth and brighten

Stray Hair and Dust on Clothes
Similar to shine, small dust specs, lines, or stray hairs can distract the viewer when looking at your photo. Use the healing brush tool to easily fix these imperfections.
Composition
The composition of a photo means how the objects in the photo are arranged in relation to each other. Sometimes, there can be objects in a photo that distract from the overall composition. To remove elements of a photo that you don’t want to show, try the following:
- Cropping out awkward tables, background items
- Photobombs
- Straighten angles or horizons that are off
- Use the rule of thirds and to crop images

Colors
Changing colors in a photo isn’t always necessary. However, if there are any sections of color in a photo that need to be addressed, you can do the following:
- Bright shirts/outfits can be taken down in saturation
- Dull/brighten colors
- Even skins tones, color replacement tool

Bluriness
There isn’t a whole lot you can do if your photo is blurry but the unsharp mask can help. The unsharp mask tool in Photoshop can be a little complicated to use, so, I suggest hunting YouTube for a tutorial. If that is a little too challenging, you can also try using the Sharpen tool in Photoshop.
Noise
If you take a photo in low light, it can sometimes appear grainy. This “grain” is called the Noise of a photo. To reduce noise in a photo, you can use a noise-reducing filter in Photoshop.
Resolution
Your photo should be ready to go! Now that you are ready to export your photo, make sure they are sitting at the correct resolution:
- 150-300 for print
- 72 for web
Your Final Tip
After all those, sometimes the most important tip I can offer is knowing the photo you have isn’t good enough to use. Photoshop’s tools can do a lot, but it can’t change everything. Before you turn off your computer, make sure you check the photo’s DPI, size, file size, and always keep an original copy.
Special thanks to Emma the dog for being a great model for this blog.
Blog


